


Popped deck boards start as a minor annoyance and end as a legitimate trip hazard, and the fastener heads sticking up above the decking are usually the first sign that something below the surface has already shifted. This guide walks through why deck boards pop up in the first place, how to fix the problem so it does not just return next season, and how to tell the difference between a quick fastener swap and a board that needs to come out entirely.
How do you fix a deck board that is bowing up? Pull the popped fasteners, check the board and joist underneath for rot or warping, then re-fasten with corrosion-resistant deck screws driven at a slight angle into solid joist material. If the board itself has cupped or split, replacing that single board is usually faster and more durable than fighting the warp with more screws.
Most homeowners can handle this repair with a drill, a pry bar, and an afternoon. But if the popping is widespread across the deck, if you are finding soft or spongy joists underneath, or if you would rather hand the whole assessment to someone who does this daily, Ace Handyman Services can take that scoping and repair work off your plate at any stage of the project.
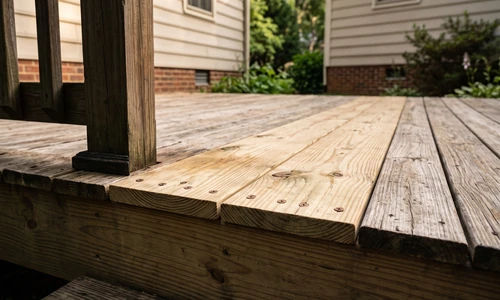
Quick Overview: What Fixing Popped Deck Boards Involves
Before pulling out tools, it helps to see the whole arc of the job. Most popped-board repairs follow this sequence:
- Walk the deck and mark every popped or raised fastener, not just the one you noticed first
- Identify the decking material (pressure-treated lumber, cedar, or composite) since this changes your fastener and extraction approach
- Extract the old nail or screw, checking whether the hole is stripped, enlarged, or still tight
- Inspect the board and the joist underneath for rot, splitting, or cupping before re-fastening anything
- Decide board by board: repair with new fasteners, or pull the board and replace it
- Re-fasten with the correct exterior-grade screw for the material, using a new pilot hole location if the old one is compromised
- Set a seasonal inspection habit so the next round of popping gets caught early
What Causes Deck Boards to Pop Up: The Seasonal Moisture Cycle
Why are my deck boards separating and popping up? Wood absorbs and releases moisture with the seasons: it swells in humid summer months and shrinks as it dries in winter. Fasteners driven when the board was one moisture level lose their grip as the wood moves, and repeated cycles gradually push nail and screw heads above the surface until they catch a bare foot or a broom.
Nails rely on friction between the shank and the wood fibers to stay put. Every expansion and contraction cycle loosens that friction slightly. A board can move a measurable fraction of its width across a full moisture swing, and that movement is enough to walk a nail out over several seasons even though no single cycle looks dramatic. Screws resist this because their threads mechanically bite into the wood rather than depending on friction alone, which is why nail-to-screw conversion is the standard fix rather than just hammering nails back down.
How Wood Type Affects Popping Severity
Pressure-Treated, Cedar, and Composite Behave Differently
Pressure-treated lumber carries more residual moisture at installation than kiln-dried cedar, so it tends to shrink more dramatically in its first year as it dries out, which is often when popping first appears on a new deck. Cedar is more dimensionally stable once it acclimates but still moves seasonally, just less aggressively. Composite decking does not absorb moisture the way wood does, but it expands and contracts with temperature rather than humidity, and composite boards can loosen around fasteners if the manufacturer's spacing and pre-drilling guidance was not followed at installation.
This matters for repair strategy. A pressure-treated board popping in its first year may simply need re-fastening once it has fully dried and stabilized. A composite board with a popped fastener often points to an installation error rather than a moisture cycle, since composite fastener systems are engineered around specific screw types and clip systems that do not tolerate substitution well.
Essential Equipment and Materials for Deck Board Repair
Tools and Safety Gear You Will Need
A cordless drill/driver handles most of this job, but pair it with an impact driver if you are working on composite decking or expect stuck, rusted fasteners. A flat pry bar helps lift boards without splitting them, and a stud finder or simple tapping test helps you confirm joist location before you drive a new screw blind.
Selecting the Right Fastener for Your Deck Material
For wood decking, use galvanized or stainless deck screws, typically 3-inch length for standard 5/4 or 2-inch decking into joists. For composite decking, use the fastener type specified by the manufacturer, since many composite systems require color-matched or coated screws to prevent staining and mushrooming around the screw head. Fastener choice matters more than technique alone; the wrong screw type can crack composite material or fail to hold in wood over time.
Other Materials You Will Need
- Replacement composite or wood deck screws in the correct length and coating
- Wood filler or exterior caulk rated for outdoor use, if reusing an enlarged hole
- A replacement board matching your existing decking, in case a board fails inspection
- Exterior wood sealant or stain if the repair exposes fresh, unfinished wood
If sourcing the right composite-specific fastener system feels like more research than you bargained for, that is exactly the kind of decision point where handing the project to deck and patio repair professionals saves both time and a return trip to the hardware store.
Step-by-Step Deck Board Repair Process
Step 1: Assess Fastener Type and Condition
Start with an honest look at what you are dealing with before you touch a drill. Walk the entire deck surface, not just the board that prompted the project, and mark every raised fastener with painter's tape. Note whether each fastener is a nail or screw, since nails almost always need full conversion to screws rather than reinsertion.
Step 2: Extract Nails and Stuck Screws
Use the flat pry bar under the fastener head, working slowly to avoid splitting the board around the hole. Rusted screws often shear off rather than back out cleanly; if the head strips, a screw extractor bit or locking pliers on an exposed shank can help. On composite decking, extraction can take extra patience since the material grips fastener threads differently than wood; an impact driver set to a lower torque setting reduces the risk of chewing up the surrounding hole.
Step 3: Re-fasten with Correct Exterior-Grade Screws
Replacing popped fasteners condensed: extract the old fastener, inspect the hole and joist for damage, then drive a new exterior-grade screw at a slight angle if the original hole is enlarged, offsetting from the original location by an inch when possible to bite into solid wood. This sequence restores mechanical hold instead of relying on the compromised original hole.
If the original hole is stripped or enlarged, do not simply drive a new screw into the same spot; it will not hold. Offset the new fastener location slightly, or fill the old hole with exterior wood filler first and let it cure before drilling a fresh pilot hole nearby.
When to Repair vs. When to Replace a Deck Board
When should you repair a popped board versus replacing it entirely? Surface cracks, minor warping that flattens under pressure, and a single popped fastener call for repair. Cupping that will not flatten, splits running with the grain, or soft and spongy wood signal replacement. If the joist underneath shows rot or decay, address that structural issue before re-fastening anything on top of it.
A board that has cupped significantly will keep fighting new fasteners no matter how many you add, since the wood's internal stress does not release just because you drove a screw through it. Replacing that one board, rather than layering fasteners into a losing battle, saves time and holds up longer.
Prevention: Fastener Standards for New Decks or Board Replacements
If you are replacing boards or building new, screws beat nails from the start because of that friction-versus-mechanical-hold difference discussed earlier. Standard spacing runs one fastener every 12 to 16 inches along each joist, though local building code may specify tighter tolerances, so check the International Residential Code deck fastening tables or your local permitting office before finalizing spacing on a new build. Sealing or staining the decking after installation slows moisture absorption into the fastener holes themselves, which reduces the rate of future loosening.
Deck orientation matters too. Boards facing full southern sun exposure see more aggressive drying and moisture swings than shaded boards, which means south-facing decks in sunny climates may need closer fastener spacing or more frequent inspection than a shaded northern exposure.
Regional Climate and Deck Popping: What to Expect
Freeze-thaw cycles in cold climates put wood through repeated rapid moisture and temperature swings, accelerating fastener loosening compared to milder regions. High-humidity areas see more consistent swelling that can mask popping until the dry season reveals it. Arid, low-humidity climates dry lumber out faster and may show popping earlier in a board's life as it reaches equilibrium moisture content. None of this means one climate is worse for decking overall, but it does mean your inspection schedule should match your local conditions rather than a generic calendar.
Screen-and-Recoat vs. Full Board Replacement
Not every popped board justifies pulling and replacing lumber. A lighter approach, simply re-fastening and resealing, works when the wood itself is structurally sound.
- Choose re-fastening and resealing when: the board is flat, free of splits, and the only issue is a raised fastener or two
- Choose re-fastening and resealing when: the joist underneath is solid and dry
- Choose full replacement when: the board has visible cupping, cracking along the grain, or soft spots
- Choose full replacement when: multiple fasteners have failed on the same board repeatedly despite proper re-fastening
Special Considerations for Challenging Decks
Older decks built before modern fastener standards often used undersized or non-galvanized nails throughout, meaning a popped board you find is likely one of many waiting to surface. Decks with hidden fastener systems or tongue-and-groove composite boards require manufacturer-specific tools to disassemble without damaging adjacent boards. Decks over structural elements you cannot easily inspect, like a deck built over a walkout basement entry, warrant extra caution since a failed joist there carries higher consequences than a simple backyard platform.
When a deck has irreplaceable or discontinued composite decking, matching a replacement board exactly can be difficult, and a miscalculated cut wastes material you cannot easily reorder. This is a common point where homeowners bring in deck and patio professionals to handle the sourcing and precision work rather than risk an expensive material mismatch.
Maintenance and Long-Term Care
How often should you inspect a deck for popping fasteners? Check twice a year, once in spring after winter's dry contraction and once in fall before winter moisture swings begin. In harsher freeze-thaw or high-humidity climates, a mid-summer check is worth adding. Walk the surface, press on boards near railings and in shaded corners where popping hides longest, and look for any fastener head sitting proud of the decking.
- Reseal or restain decking on the manufacturer's recommended schedule to slow moisture cycling
- Keep gutters and downspouts directing water away from the deck structure
- Clear leaves and debris from between boards so moisture does not sit trapped against fasteners
- Address any popped fastener promptly rather than waiting for several to accumulate
Troubleshooting Common Mistakes During Repair
Hammering a popped nail back down rarely holds since it does nothing to restore the friction grip that already failed, and it can crack the surrounding wood fibers further. Reusing an enlarged nail hole with a new screw often fails the same way, since the hole no longer has enough intact wood to bite into. Ignoring the joist underneath a lifted board is a common oversight; hidden rot or decay there means any new fastener is anchored into compromised wood regardless of how well the deck board itself was repaired.
Things to Consider Before You Start
- How many boards are actually affected? A single popped fastener is a quick fix; a deck with popping across a dozen boards points to a systemic installation or aging issue worth a full assessment.
- Can you access the joists underneath? If the deck skirting or underside is enclosed, checking joist condition may require more disassembly than expected.
- Is your decking material still available to match? Discontinued composite colors or profiles complicate a clean replacement board.
- Do you have the right fastener system on hand? Composite decking especially punishes substituted fasteners.
If the answers point to a straightforward one or two board fix with clear joist access, this is a solid weekend DIY project. If you are looking at widespread popping, uncertain joist condition, or a composite fastener system you are not confident sourcing correctly, that is the side of the line where bringing in professional help protects both your time and your deck.
Why Homeowners Bring in Ace Handyman Services
Deck repairs sit right at the intersection of visible cosmetic issues and hidden structural risk, and that combination is exactly why many homeowners choose not to go it alone.
- Peace of mind when a joist inspection reveals more than expected, since a miscalculation on a load-bearing deck component carries real safety consequences
- A one-year labor warranty backing the repair work, so a re-popped fastener or a missed rot spot is not left for you to fix twice
- No need to source, learn, or return specialty fastener systems for composite decking
- Background-checked, multi-skilled W-2 craftsmen, not day-labor subcontractors, handling the work
- A predictable weekday timeline that does not eat into your weekends
- Right-sized scope: if your deck only needs a light re-fastening rather than a full board replacement, that honest assessment is part of the visit
- Cleanup included, so old fasteners, sawdust, and packaging do not become your problem afterward
If you would rather have a professional walk your deck, identify every popped fastener and hidden joist issue at once, and handle the repair correctly the first time, reach out to your local Ace Handyman Services office to get the process started.
Frequently Asked Questions
How do I fix a deck board that keeps creaking as well as popping?
Creaking usually means the fastener has already lost its grip and the board is shifting slightly under weight. Extract the loose fastener, check for joist damage underneath, and re-fasten with a properly sized exterior screw offset from the old hole; this typically resolves both the creak and the visible popping together.
How do I fix uneven deck boards without pulling them all up?
Target only the boards that are actually raised or misaligned rather than disturbing boards that are sitting flat and secure. Re-fasten the affected boards individually, checking each against its neighbors for level, and only remove a full board if it is warped beyond what re-fastening can correct.
Can I screw a new fastener into the same hole where a nail popped out?
Generally no, since the enlarged hole no longer has enough solid wood fiber for a screw to grip properly. Offset the new screw an inch or so from the old hole, or fill the old hole with exterior wood filler and let it cure before drilling a fresh pilot hole nearby.
Why do composite deck boards pop up differently than wood boards?
Composite decking does not swell and shrink with humidity the way wood does; instead it moves with temperature changes and depends heavily on the manufacturer's specified fastener and spacing system. Popping on composite decking more often points to an installation error or wrong fastener type than to a natural moisture cycle.
What does it cost to replace a few popped deck boards?
Material costs for replacement deck screws and a single board typically run modestly, though composite boards cost more than standard pressure-treated lumber. The bigger cost variable is labor time if joist repair or rot removal is also needed, which is worth factoring in before starting the project.
How long does a deck board repair take?
A single popped board with easy joist access can be repaired in under an hour. A deck with widespread popping across many boards, or one requiring joist inspection and partial board replacement, is more realistically a weekend project.