


A wobbly deck railing is more than an annoyance. It is a safety concern that gets worse every season you ignore it, and it happens to be one of the more common repair calls homeowners make once they notice movement they cannot explain. This guide walks through why railings loosen, how to tell a cosmetic wobble from a genuine structural problem, and the tools and techniques for fixing it right the first time.
How do you fix a wobbly deck railing? Most wobbly deck railings are fixed by tightening or replacing loose fasteners at the post-to-rail and post-to-deck connections, then adding pressure-treated blocking or upgraded hardware if tightening alone does not eliminate the movement. Start with an inspection before you touch a single bolt.
Some homeowners work through every step below on a Saturday afternoon. Others get partway into an inspection, find damage they were not expecting, and decide the smarter move is to bring in Ace Handyman Services to finish the job. Both paths are reasonable, and this guide supports either one.
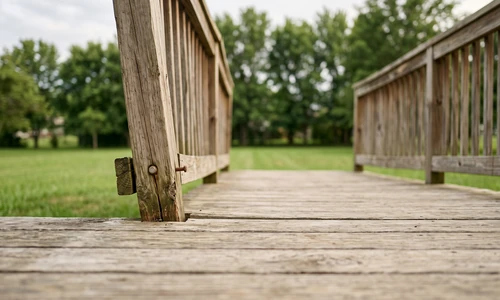
Quick Overview: What Deck Railing Repair Actually Involves
Before you gather tools, it helps to know the shape of the project. Deck railing repair usually moves through these stages:
- Assess the wobble with a push/pull test to determine severity
- Inspect every connection point from the top cap down to the deck frame
- Tighten or replace loose fasteners at post-to-rail and post-to-deck joints
- Add pressure-treated blocking or upgraded hardware if tightening does not fully resolve the movement
- Apply sealant at fastener penetrations to block moisture going forward
- Recheck the railing under load and schedule seasonal follow-up inspections
Why Deck Railings Become Loose and Wobbly
Wood railings expand and contract with humidity and temperature swings throughout the year. That constant movement works fasteners loose over time, even ones installed correctly. Add foot traffic, kids leaning on rails, and the occasional lawn chair bump, and vibration cycles compound the problem at every post-to-rail and post-to-deck mounting connection.
Moisture infiltration is the other major culprit. Water finds its way into fastener holes, swells the surrounding wood fibers, then dries and shrinks them, leaving a gap the fastener can no longer fill snugly. Over several seasons, that cycle turns a tight connection into a loose one. Improper installation, such as pilot holes drilled too large or fasteners driven at an angle, accelerates the same failure.
Assessing Railing Wobble: Safety vs. Cosmetic Issues
How can you tell if deck railing wobble is dangerous? Apply firm lateral pressure to the top rail, roughly what a person leaning against it would exert. Movement under an inch generally indicates a cosmetic, fastener-based issue. Movement beyond that, visible cracking, splintering, or a post that shifts at its base signals a structural problem requiring professional evaluation before use.
Building codes typically require railings to resist 200 pounds of lateral force without failure. You cannot replicate that force safely by hand, but you can use the push/pull test as a screening tool. Walk the entire railing run, testing every few feet rather than assuming one loose spot means the rest is fine. Once you know which sections need attention, you can move into a full inspection with a clear picture of severity.
Tools, Materials, and Fasteners You'll Need
Matching Your Toolkit to the Repair Scope
A minor tightening job needs a fraction of the equipment a full reinforcement project requires. For inspection and tightening, a cordless drill with driver bits, a socket set matching your bolt heads, and a flashlight for shadowed connection points cover most of the work. Intermediate repairs that involve replacing stripped fasteners add a drill bit set for new pilot holes and a selection of carriage bolts, lag screws, and 2.5-inch deck screws sized to match the original hardware.
When Blocking and Reinforcement Enter the Picture
Advanced repairs that call for pressure-treated blocking or hardware upgrades bring in a circular saw or handsaw for cutting blocking to length, exterior-rated construction adhesive, and galvanized or stainless fasteners rated for outdoor exposure. A torque wrench is not mandatory, but it removes the guesswork on carriage bolts, which typically tighten to 15 to 25 foot-pounds depending on wood density.
Other Materials You Will Need
- Exterior-grade wood sealant or caulk for fastener penetrations
- Replacement pressure-treated blocking (2x4 or 2x6, matched to your framing)
- Corrosion-resistant washers and backing plates
- Wood filler for stripped screw holes
- Work gloves and eye protection
- Tape measure and a square for blocking layout
If the inspection turns up hardware you cannot source easily, or the blocking work looks more involved than a weekend allows, scoping the project alongside deck and patio repair specialists can save a return trip to the hardware store.
Step-by-Step Inspection Process
What is the process for inspecting a deck railing before repair? Work from the top of the railing down: check cap connections first, then post-to-rail joints, then post-to-deck mounting hardware at the rim joist or frame. At each point, test bolt and screw tightness, look for cracked or splintered wood, and note any corroded hardware needing replacement.
Checking Post-to-Rail Connections
This is where wobble most often originates. Bolts and screws at this joint absorb lateral force every time someone leans on the rail, and repeated loading backs threads out gradually. Grip the rail near each post and wiggle it while watching the connection point. A screw head that spins without resistance, or a bolt head that has backed away from the wood surface, tells you that fastener needs attention.
Examining Post-to-Deck Mounting
Surface-mounted railings, secured with lag screws into the rim joist and plastic post anchors at the base, loosen faster than through-bolted systems because the connection relies on wood grip strength alone rather than a bolt passing all the way through the structure. Through-bolted installations use carriage bolts with washers and backing plates on the inside of the rim joist for a mechanically stronger hold. Check lag screw tightness, inspect plastic anchors for cracking, and look for wood damage or soft spots around every fastener location.
Tightening Loose Fasteners: The Primary Fix
How do you fix a loose deck railing? Start at the top of the railing and work down, tightening bolts and screws in sequence rather than skipping around. Snug carriage bolts to roughly 15 to 25 foot-pounds and lag screws to 20 to 30 foot-pounds, stopping once resistance builds. Replace any fastener that spins without tightening or shows visible corrosion.
Over-tightening causes its own problems. A fastener that suddenly spins freely after resistance has stopped means the threads have stripped the surrounding wood. When that happens, remove the fastener, fill the hole with wood filler or a glued dowel, let it cure, and redrill a fresh pilot hole slightly offset from the original. Replace corroded fasteners with galvanized or stainless equivalents rather than reusing rusted hardware, since corrosion weakens the metal even where it still appears intact.
Reinforcing Connections with Blocking and Hardware Upgrades
Choosing and applying blocking material. When tightening alone does not eliminate wobble, the gap between the post and rim joist has usually grown too wide for fasteners to close on their own. Cut pressure-treated blocking to fit snugly between joists, secure it with exterior-rated construction adhesive and screws, then re-anchor the post directly to the new blocking. This gives the connection fresh, solid wood to grip instead of a fastener hole worn oversized by years of movement.
Hardware upgrades pair well with blocking. Swap plastic post anchors for metal ones, step up to larger-diameter bolts if the original holes have enlarged, and add backing plates or fender washers to distribute load across a wider surface. In wet or coastal climates, use hot-dip galvanized or stainless steel fasteners exclusively; standard zinc-plated hardware corrodes faster under repeated moisture exposure and undoes the repair within a season or two.
Material-Specific Repair Methods
Wood, Aluminum, and Composite Considerations
Wood railings respond well to the tightening and blocking methods above, but remember that wood continues to swell and shrink seasonally even after repair, so a follow-up check the next season is normal maintenance, not a sign of failed work. Aluminum railings use anodized finishes that scratch and corrode if you introduce dissimilar metal fasteners; stick with stainless steel hardware to avoid galvanic corrosion at the connection points.
Full Repair vs. Simple Tightening
Not every wobbly railing needs blocking, replacement hardware, and a full weekend. Deciding which path fits your situation comes down to what the inspection reveals.
- Simple tightening is the right call when: fasteners are intact but backed out, wood around connections shows no cracking or soft spots, and the wobble disappears once bolts are re-torqued
- Full repair with blocking and hardware upgrades is the right call when: fastener holes have stripped or enlarged, wood shows splintering or moisture damage near connections, or the railing continues moving after tightening every visible fastener
Special Considerations for Older or Damaged Railings
Railings installed more than 15 to 20 years ago often combine several problems at once: original fasteners that were undersized by today's standards, wood that has absorbed decades of moisture cycles, and connections that were never through-bolted to begin with. Treat any deck of that age as a candidate for a full structural review rather than a spot repair, since a wobble on one post frequently signals similar wear at every post along the same run.
Contaminated or rotted wood at a post base is not a candidate for DIY reinforcement. If a screwdriver sinks into the wood around a mounting point with light pressure, that section has decayed past the point where any fastener will hold securely. If you are working through age-related deck issues on a structure this old, a conversation with deck and patio specialists before you start cutting into blocking can prevent a repair that fails again within a year.
Maintenance and Long-Term Care
How often should you inspect deck railings to prevent wobble? Check every connection point at minimum twice a year, in spring and fall, with an additional check after winter in freeze-thaw climates. Seasonal inspection catches loosening fasteners before they progress into stripped holes or structural gaps.
- Apply sealant around fastener penetrations to block moisture before it reaches the wood fibers
- Refresh stain or sealant on wood railings on the manufacturer's recommended cycle, typically every one to three years
- Avoid tightening fasteners to maximum torque during cold weather, since wood contracts in winter and over-tightening then worsens summer expansion movement
- Keep cap connections secure, since a loose cap accelerates water intrusion into the post below it
Building Codes and Safety Standards for Deck Railings
Deck railing codes vary by jurisdiction, but most follow IRC or IBC guidance calling for 36 to 42 inch railing height, baluster spacing no greater than 4 inches, and resistance to 200 pounds of lateral force. Repairs that involve replacing posts or adding significant new blocking may trigger a permit or inspection requirement depending on your local building department. Check with your municipality before undertaking major reinforcement work, and treat this guidance as a starting point rather than a substitute for jurisdiction-specific research.
Things to Consider Before You Start
- Does the wobble affect more than one section? Multiple loose spots along the same railing run often point to a systemic issue rather than isolated fastener wear.
- Are you comfortable working at height near an open edge? Railing repair happens right at the deck perimeter, and some sections require leaning over the edge to access backing hardware.
- Do you have a clear path to source matching fasteners? Mismatched hardware, especially mixing metals, can accelerate corrosion at the repair site.
- Is the surrounding wood structurally sound? Soft, splintering, or discolored wood around a connection point signals a problem tightening cannot fix.
If your answers point toward a straightforward tightening job, you are on solid ground to proceed. If they point toward extensive damage, multiple failure points, or an aging deck you are not fully confident in, that is the signal to bring in help before the project grows.
Why Homeowners Bring in Ace Handyman Services
A deck railing is one of the few home repairs where getting it wrong carries real safety consequences, and that is exactly why many homeowners choose not to gamble on a DIY fix that might not hold. Here is what working with Ace Handyman Services adds to the equation:
- Peace of mind on a repair where a miscalculation risks a fall, not just a redo
- A one-year labor warranty backing the work performed
- No need to source, learn, or return specialty tools like torque wrenches or masonry bits for blocking work
- Background-checked, multi-skilled W-2 craftsmen, not gig-platform contractors
- A predictable weekday timeline that does not eat into your weekend
- Right-sized scope, including an honest recommendation for simple tightening when that is genuinely all the railing needs
- Cleanup included once the repair is finished
Whether you have already tightened every fastener you can find and the wobble persists, or you would rather hand off the entire inspection from the start, you can reach out to your local Ace Handyman Services office to get the railing evaluated and repaired properly.
Frequently Asked Questions
How much does it cost to fix a porch or deck railing?
Simple fastener tightening costs little beyond a handful of replacement bolts and screws, often under 50 dollars in materials. Full repairs involving blocking, hardware upgrades, or partial rail replacement typically run from a few hundred to over a thousand dollars depending on the extent of damage and whether professional labor is involved.
How do you fix a rotted deck railing?
Rotted sections cannot be tightened back into service. Cut out the affected post, baluster, or rail section back to solid wood, then replace it with new pressure-treated or matching material fastened with corrosion-resistant hardware. Any rot found at a post base near the deck frame should prompt a check of the surrounding rim joist for hidden damage.
How do you repair a broken deck railing spindle or baluster?
Remove the fasteners holding the broken baluster in place, measure the gap precisely, and cut a replacement from matching material. Secure it with the same fastener type used elsewhere on the railing, typically deck screws driven through pilot holes to avoid splitting.
Can you fix a wobbly deck railing without replacing the whole railing?
Yes, in most cases. The majority of wobble complaints trace back to loose fasteners or minor gaps at connection points, both of which respond to tightening or blocking rather than full replacement. Full replacement becomes necessary only when the structural wood itself has failed.
What tools do I need to tighten a deck railing?
A cordless drill with driver bits and a socket set matching your bolt heads handle most tightening jobs. Add a drill bit set and replacement fasteners if any hardware needs to come out, and a torque wrench if you want precise control over how tight carriage bolts and lag screws get.
How do I know if my deck railing needs a professional instead of a DIY fix?
If the railing continues moving after every visible fastener has been tightened, if you find cracked or rotted wood at connection points, or if the deck is older than 15 to 20 years with no record of railing upgrades, a professional structural evaluation is the safer next step before continued use.