


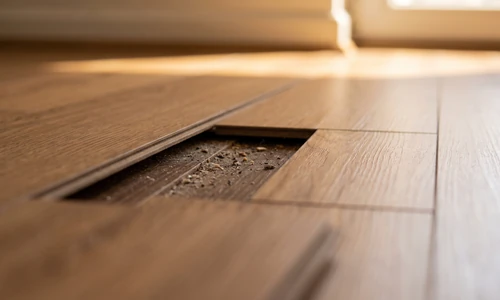
Gaps between laminate planks are one of the most common complaints homeowners bring up after a few seasons in a floating floor. A hairline gap here and there is cosmetic. A quarter-inch gap running the length of a room signals something deeper going on with your subfloor or your home's humidity swings.
How do you repair laminate flooring without replacing it? Most laminate gaps can be closed without pulling up a single plank. Depending on gap width and cause, you can re-tap loose planks with a rubber mallet, fill the gap with a color-matched filler, or reinforce the seam with wood glue. Full replacement is only necessary when gaps signal structural damage or widespread subfloor movement.
If you get partway through diagnosing the cause and realize the gaps trace back to a subfloor issue or a room-wide humidity problem, that is a reasonable point to bring in Ace Handyman Services. Some fixes are a 20-minute afternoon project; others are a symptom of something bigger that deserves a second set of eyes.
Quick Overview: What Fixing Laminate Floor Gaps Involves
Before grabbing tools, it helps to see the whole process laid out. Here is what a typical laminate gap repair looks like from start to finish:
- Measure the gap width and note its location (mid-floor, along a wall, around a door frame)
- Identify the likely cause: humidity swing, subfloor movement, or installation error
- Choose a repair method based on gap size: mallet re-tapping, filler, glue, or a combination
- Prep the area by vacuuming debris from inside the gap
- Apply the chosen method and allow proper cure or set time
- Check adjoining planks and baseboards for related movement
- Put humidity and monitoring practices in place to prevent recurrence
Identifying Gap Type and Size: The First Step to Choosing Your Repair Method
Gap classification determines everything downstream. Hairline gaps under 1/16 inch are usually cosmetic and often close on their own with humidity recovery; wood glue alone can stabilize them. Visible gaps between 1/16 and 1/4 inch typically need filler, sometimes paired with glue for structural seams. Wide gaps over 1/4 inch, especially if they run across multiple planks, point to subfloor movement or acclimation failure and may need mallet re-tapping before filler will hold at all.
Measuring Accurately
Use a small metal ruler or feeler gauge rather than eyeballing it. Photograph each gap with the ruler in frame; this documentation helps you track whether a gap is stable or actively widening over a few weeks, which matters for the cause diagnosis below.
Where the Gap Sits Matters
A gap isolated to one plank seam behaves differently than a gap that runs consistently along an entire row. Isolated gaps often trace to a single damaged or improperly seated plank. Row-wide gaps point toward broader movement, whether that is seasonal expansion and contraction or a subfloor that is not staying flat.
Why Gaps Form in Laminate Flooring
Three causes account for nearly every laminate gap. Moisture and humidity fluctuation is the most common: laminate core material expands and contracts with ambient moisture, and floating floors are engineered to shift slightly as a result. Subfloor movement or deflection, from a joist that flexes under load or a subfloor that was not level at installation, creates gaps that follow structural lines rather than random patterns.
Knowing which of these applies to your floor changes your repair plan. A humidity-driven gap that closes back up seasonally may not need a permanent fix at all. A subfloor-driven gap will keep returning until the subfloor issue is addressed, no matter how many times you fill it.
Essential Equipment and Materials for Laminate Gap Repair
Rubber Mallet vs. Pull Bar
A rubber mallet is the standard tool for re-tapping loose planks back into alignment, but for planks near a wall where you cannot get a clean swing, a pull bar (sometimes called a laminate jack) hooks the plank edge and lets you draw it tight without direct impact. Own a rubber mallet if you plan on tackling minor gaps regularly; a pull bar is worth renting or borrowing for a single repair session.
Choosing Filler by Gap Size
Wood filler works well for cosmetic gaps under 1/8 inch where color matching to the plank finish is the priority. Epoxy filler holds up better in gaps approaching 1/4 inch or in high-traffic areas because it cures harder and resists compression. Neither filler restores structural integrity to a seam; that is wood glue's job.
Other Materials You Will Need
- Color-matched laminate filler crayon or two-part epoxy kit
- Wood glue rated for laminate or engineered flooring
- Plastic putty knife (avoid metal, which can scratch the wear layer)
- Painter's tape to mask surrounding planks during filler application
- Shop vacuum with narrow attachment for debris removal
- Clean microfiber cloths
If the gaps you are looking at run through several rooms or you are not confident distinguishing a humidity gap from a subfloor gap, a technician with laminate floor installation and repair experience can diagnose the cause before you spend an afternoon on the wrong fix.
Step-by-Step Laminate Gap Repair Process
Step 1: The Rubber Mallet Method for Recent, Loose-Plank Gaps
Use controlled, even taps rather than force. This method works best on gaps caused by recent moisture-driven expansion or planks that never fully seated during installation. Place a tapping block against the plank edge to protect the locking mechanism, then tap firmly but evenly to walk the plank back into its neighbor. Work in short sections rather than trying to close a whole row at once. Avoid this method on brittle or already-cracked planks; re-tapping stressed laminate can shatter the locking tongue and turn a gap repair into a plank replacement.
Step 2: Filling Gaps with Wood and Epoxy Fillers
What is the best product to fill gaps in laminate flooring? Wood filler suits hairline to 1/8-inch gaps where color matching and a quick dry time matter most; it dries in under an hour but has moderate durability. Epoxy filler suits gaps up to 1/4 inch, takes several hours to cure fully, and holds up significantly longer under foot traffic. Choose epoxy for structural seams and wood filler for purely cosmetic touch-ups.
Apply filler with a plastic putty knife, slightly overfilling the gap, then scrape level once it begins to set. Wipe excess before full cure; both filler types are difficult to remove once hardened. Filler masks a gap cosmetically but does not by itself prevent the seam from reopening if the underlying cause is still active.
Step 3: Using Wood Glue for Joint Stability
Glue reinforces the joint; it does not hide the gap. For seams that keep separating, work a thin bead of wood glue rated for laminate into the joint with a fine applicator tip, then press the planks together and hold with painter's tape or a clamp if the location allows it. Let it cure fully, typically 24 hours, before allowing foot traffic across that seam. Glue works best combined with filler: glue restores joint strength, filler restores appearance.
Repair Method Selection Matrix
Match your diagnosis to a method: hairline invisible gaps after a humidity drop typically need glue only. Visible gaps up to 1/8 inch from minor settlement respond well to filler alone. Gaps between 1/8 and 1/4 inch, especially at seams under stress, usually need filler plus glue for both appearance and stability. Gaps over 1/4 inch or spanning multiple rows point to a loose or shifted plank that needs mallet re-tapping before any filler or glue will hold long term.
Special Considerations: Gaps Around Doors and Horizontal Gaps
Gaps Around Door Frames
Gaps at door transitions are frequently caused by the door frame or threshold settling rather than the floor itself expanding. Check the frame for movement before assuming the laminate is at fault; a settled frame may need shimming or a transition strip adjustment rather than a floor repair.
Horizontal Gaps Across an Entire Row
When an entire row of planks shows consistent gapping, look at the subfloor first. This pattern suggests deflection along a joist line or a low spot that never received proper leveling compound at installation. Filling these gaps without addressing the subfloor is a temporary fix at best.
Vintage laminate installed before modern moisture barriers were standard, or floors laid directly over concrete without adequate underlayment, are more prone to recurring gap patterns. If your floor falls into that category, a broader assessment through floor installation and repair services can catch subfloor issues before they undo a fresh repair.
Choosing and Applying Fillers: Cure Times and Aftercare
Wood filler typically reaches a workable set within 30 to 60 minutes but continues hardening for a day or more; avoid heavy furniture or rolling loads across it for at least 24 hours. Epoxy filler needs longer, often 4 to 8 hours to set and up to 24 hours for full cure, but resists compression better once fully hardened.
Spot Repair vs. Full Laminate Floor Replacement
Spot repair is the right call when gaps are isolated, the surrounding planks show no cupping or buckling, and the cause is clearly humidity-related or a single misaligned plank. Full replacement becomes the more sensible option in a different set of circumstances.
- Choose spot repair when gaps are limited to one or two seams and the rest of the floor is stable
- Choose spot repair when the cause is a recent humidity swing and the floor has otherwise performed well for years
- Choose replacement when gaps appear across multiple rooms or follow a structural line in the subfloor
- Choose replacement when planks show cupping, buckling, or delamination alongside the gaps
- Choose replacement when the floor has already been repaired multiple times in the same area without lasting results
Special Considerations for Challenging Laminate Gap Repairs
Discontinued laminate patterns present a real color-matching challenge; filler crayons and epoxy tints rarely match a faded or sun-exposed plank perfectly. In these cases, consider whether the gap is visible enough in daily use to justify the cosmetic risk of a mismatched fill. Floors with water damage history need extra scrutiny: gaps combined with any soft spots or discoloration point to moisture intrusion beneath the surface, not just seasonal expansion, and filling over that without addressing the source will not hold.
If you are dealing with a floor that has multiple recurring issues, an experienced flooring team can assess whether the remaining life in the floor justifies continued repair or points toward replacement.
Maintenance and Long-Term Care
Managing humidity and monitoring your floor prevents costly repairs down the line. Keep indoor humidity in the 30 to 50 percent range year-round using a humidifier in dry winter months and a dehumidifier or air conditioning in humid summer months. Inspect seams seasonally, particularly after the first hard freeze and the first sustained humid stretch of summer, since these transition periods reveal new movement fastest.
- Keep a humidity monitor in the room with the most gap activity
- Wipe up spills immediately rather than letting moisture sit at seams
- Recheck expansion gaps at the wall perimeter annually; they should never be fully blocked by trim or furniture
- Photograph problem areas each season to track whether gaps are stable or worsening
Things to Consider Before You Start
- Do you know the cause, or are you guessing? Filling a gap without understanding why it formed risks a repeat repair within a season.
- Is the gap isolated or part of a pattern? Patterns across rows or rooms deserve more investigation before you commit to a filler-only fix.
- Do you have the patience for cure times? Rushing foot traffic onto fresh glue or filler undoes the repair.
- Can you color-match confidently? Visible, high-traffic areas raise the stakes on a mismatched filler application.
If you are confident in the diagnosis and comfortable with the cure-time patience the repair demands, this is a solid weekend DIY project. If the gaps keep coming back or trace to something under the floor, that is the point where it makes sense to bring in help.
Why Homeowners Bring in Ace Handyman Services
Laminate floors are not cheap to replace, and a gap repair that goes wrong, whether from the wrong filler choice or a missed subfloor issue, can cost more than the original problem. Here is what homeowners get when they bring in professional help instead of guessing:
- Peace of mind on a surface that is expensive and disruptive to replace if a repair goes sideways
- A one-year labor warranty backing the work
- No need to source, learn, or return specialty tools like pull bars or epoxy applicators
- Background-checked, multi-skilled W-2 craftsmen, not a rotating cast of subcontractors
- A predictable weekday appointment window instead of losing a weekend to trial and error
- An honest assessment of whether a spot repair or a broader fix actually solves the problem
- Cleanup included, so you are not left with epoxy residue or sawdust to manage afterward
If your laminate floor gaps keep returning, span multiple rooms, or you would simply rather have a second opinion before committing to a repair method, reach out to your local Ace Handyman Services office.
Frequently Asked Questions
How to hide seams in laminate flooring?
Color-matched filler is the most reliable way to visually close a seam, but true concealment depends on how closely the filler matches the plank finish. For seams under stress or likely to reopen, pair filler with wood glue so the seam stays closed rather than just looking closed temporarily.
Can you fix laminate floor gaps without removing the flooring?
Yes, in most cases. Mallet re-tapping, filler, and glue are all applied in place without lifting planks. The exception is when a damaged or warped plank sits at the center of the gap; that plank may need to be swapped out individually, which is still far less disruptive than a full floor replacement.
How long do laminate floor gap repairs last?
A repair that addresses the root cause, such as glue on a humidity-related seam paired with better humidity control, can last for years. A filler-only repair on a gap caused by ongoing subfloor movement may reopen within a season, since the filler treats the symptom rather than the cause.
What causes gaps in laminate flooring?
The three main causes are humidity fluctuation causing the laminate core to expand and contract, subfloor movement or deflection along joist lines, and installation issues like inadequate acclimation or insufficient expansion spacing at the walls.
Are gaps around doors different from gaps in the middle of a room?
Often, yes. Door-frame gaps are frequently caused by the frame or threshold settling rather than the laminate itself, so check the frame and threshold before assuming the floor needs repair in that spot.
When should I stop repairing and replace the floor instead?
Consider replacement when gaps appear across multiple rooms, when planks show cupping or buckling alongside the gaps, or when the same seam has already been repaired more than once without holding. At that point, a repair is likely masking a bigger structural or moisture issue.