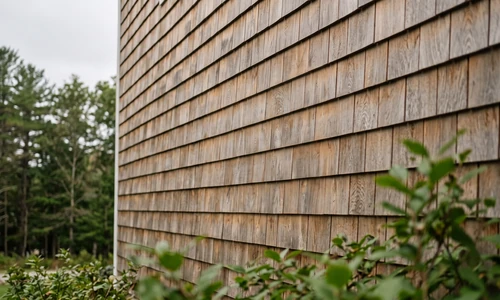
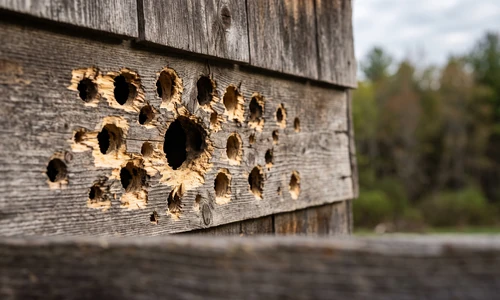
Woodpecker holes turn a clean run of wood siding into a pockmarked mess almost overnight, and the damage rarely stops at one board. Between the cosmetic frustration and the real risk of water intrusion behind the siding, most homeowners want to know exactly how bad it is and what it actually takes to fix it right.
Can woodpecker damage be repaired? Yes, in most cases. Surface-level holes under two inches deep respond well to exterior wood filler, epoxy, or a spray foam and putty combination. Damage that penetrates multiple boards, sits near window or door framing, or shows signs of structural softening needs a professional assessment before any filler goes near it.
Some of these repairs are a Saturday afternoon job. Others involve ladder work on a two-story elevation, matching a decades-old stain color, or discovering rot once you open the hole up. Ace Handyman Services works with homeowners at any point in that spectrum, whether you want a materials rundown before you start or you would rather hand the whole project to someone else once you see what is behind that first hole.
Quick Overview: What Woodpecker Hole Repair Actually Involves
- Identify hole type (drumming, nesting, or feeding) to understand what you are dealing with and whether it will recur
- Assess hole depth and extent with a flashlight and probe to decide DIY versus professional territory
- Clean the hole of loose debris, sawdust, and any insect activity before applying anything
- Select a repair material based on hole size: filler for small, foam plus putty or epoxy for larger cavities
- Apply the material using the technique specific to that product, accounting for shrinkage or expansion
- Sand progressively and match the finish to the surrounding siding, whether painted or stained
- Address the conditions that caused re-damage, since a repaired hole with the same bug problem underneath will likely reopen
- Plan for periodic touch-ups since wood siding repairs are maintenance items, not permanent fixes
Understanding Woodpecker Hole Types: Identifying Damage Before Repair
Why do woodpeckers peck holes in wood siding? Three behaviors drive the damage: drumming for territory and mating (clusters of tiny quarter-inch holes, often in spring), nesting or shelter excavation (round holes one to two inches wide, usually solitary), and feeding on insects (irregular half-inch to three-quarter-inch holes scattered across a section, often signaling a carpenter bee infestation underneath.
Drumming holes are cosmetic. They do not indicate anything wrong with your siding beyond the sound being annoying at 6 a.m. Nesting holes deserve more attention because a woodpecker excavating a cavity means it found wood soft enough to hollow out, which sometimes points to moisture damage or decay already present. Feeding holes are the most important diagnostic signal: if a woodpecker is drilling into your siding to eat, something is already living inside it.
Reading the Signs Correctly
Look at the hole pattern before deciding on a repair approach. A single clean round hole suggests nesting. A grouped cluster of small punctures suggests drumming and rarely needs more than cosmetic attention. Scattered, irregular holes with visible sawdust or frass at the base point to an active insect problem that filling the hole will not solve on its own.
Assessing Hole Depth and Damage Extent: When to DIY vs When to Call a Professional
Grab a flashlight and a thin wooden dowel or wire before reaching for any repair material. Shine the light into the hole and probe gently to gauge depth. Surface-level damage, meaning the hole does not pass through the full thickness of the siding board, is a reasonable DIY candidate. If the probe passes through into the wall cavity, or the hole sits within a few inches of a window or door frame, treat it as a professional-assessment situation rather than a weekend project.
Watch for soft, spongy wood around the hole edges when you probe. That texture change usually means moisture has been sitting in the wood longer than the woodpecker has been working on it, and filling over rotted wood just buries a problem that will resurface as bubbled paint or a soft spot within a year or two.
Essential Equipment and Materials for Woodpecker Hole Repair
Choosing Your Primary Repair Material
Your material choice depends almost entirely on hole size and depth, not personal preference. Exterior wood filler works well for holes under half an inch where no structural wood loss occurred. For holes between half an inch and two inches, a spray foam base topped with wood putty, or a quality exterior-grade epoxy, gives you a durable fill that will not sink or crack over a season. Anything larger than two inches, or damage spanning multiple boards, generally calls for a patch section of matching siding rather than filler of any kind.
Consumables and Selection Criteria
Buy exterior-rated products specifically; interior wood filler will crack and fail within months when exposed to weather cycling. Check the label for paintability or stainability depending on your siding finish, and note the cure time before you commit to a repair schedule, since some epoxies need 24 hours before sanding while filler can often be worked within an hour.
Other Materials You Will Need
- Wire brush or stiff-bristle brush for debris removal
- Compressed air or a small vacuum attachment for fine dust
- Putty knife or flexible applicator sized to the hole
- Sandpaper in 80-120 grit and 220 grit
- Exterior primer matched to your siding material
- Paint or stain matching the existing finish
- Ladder or stabilizer appropriate for the repair height
If the damage sits above the first story, or you are staring at a dozen holes across multiple elevations and the equipment list is starting to feel like its own project, a siding repair crew can scope the materials and handle the ladder work in the same visit.
Step-by-Step Woodpecker Hole Repair Process
Step 1: Clean the Hole Thoroughly
Remove every loose fiber before you fill anything. Use a wire brush to knock away splinters and loose wood, then blow out fine dust with compressed air. Any debris left inside the cavity will prevent your filler or epoxy from bonding to the actual wood surface, and a poor bond is the number one reason DIY repairs fail within a season.
Step 2: Assess Moisture and Dry the Area
Wood that feels damp to the touch needs a day or two to dry before you proceed. Filling over trapped moisture seals it inside the repair, where it will eventually cause the patch to bubble, discolor, or push loose from the inside.
Step 3: Sand and Prep the Edges
Lightly sand the hole edges to remove splinters and rough fibers so your filler has clean surface contact. For cedar or redwood, consider a wood conditioner on the exposed grain first; both species have natural oils and tannins that can interfere with adhesion if the surface is not prepped properly.
Step 4: Comparing Repair Materials for Woodpecker Holes
What is the best wood filler for woodpecker holes? For holes under half an inch, exterior wood filler alone works well. For half-inch to two-inch holes, a spray foam base with a wood putty topcoat, or an exterior-grade epoxy, holds up better against expansion and contraction. Epoxy costs more but resists cracking longer, especially in freeze-thaw climates.
Exterior Wood Filler for Small Holes
Exterior wood filler is stainable or paintable depending on the product and works best on cosmetic damage where no real wood loss occurred. It shrinks slightly as it cures, so overfill just past the surface and plan to sand it flush once dry. Cure time typically runs 30 minutes to a few hours depending on humidity and hole depth.
Spray Foam and Wood Putty Combination
For deeper cavities, spray a minimal-expansion foam into the hole first, let it cure fully, then trim the excess flush with a utility knife once it hardens. Top the trimmed foam with wood putty to create a smooth, paintable surface. This two-step method handles depth that filler alone cannot fill without excessive shrinkage or cracking, and it costs less than a full epoxy repair on larger holes.
Exterior-Grade Epoxy for Durable, Structural Repairs
Epoxy does not shrink the way filler does, so you fill it flush to the surface rather than overfilling. Mixing ratios matter here; follow the manufacturer's instructions closely since off-ratio mixes cure improperly. Cure time runs longer than filler or putty, often 24 hours before sanding, but the resulting patch resists moisture and re-pecking better than any other option because of its hardness once cured.
Step 5: Sand Progressively
Start with 80-120 grit to knock down the bulk of the material and level it with the surrounding siding, then move to 220 grit for a smooth final surface. Rushing this step leaves visible ridges that show through paint or stain, especially in raking morning or evening light.
Choosing and Applying Finishes to Match Existing Siding
Application and Cure Considerations
For painted siding, prime the repaired area before painting to prevent the patch from absorbing paint differently than the surrounding wood, which shows up as a dull or shiny spot. For stained cedar or redwood, understand that filler and epoxy rarely accept stain identically to natural wood grain; some patches remain slightly visible even with a good color match, and that is a realistic expectation rather than a failed repair. Let paint or stain cure fully per the product label before considering the job complete, since a rushed topcoat can peel within the first season of weather exposure.
Full Board Replacement vs Spot Repair
Spot repair with filler or epoxy makes sense for isolated holes on otherwise sound boards. Full board replacement becomes the better call when damage clusters heavily in one area, when the board shows rot beyond the hole itself, or when multiple woodpecker seasons have left a section of siding looking more patch than original material.
- Spot repair is the right call when: holes are isolated, the board is structurally sound, and cosmetic blending is achievable
- Full replacement is the right call when: rot accompanies the hole, damage spans a large percentage of one board, or repeated patching has left a visibly uneven surface
Special Considerations for Cedar and Older Siding
Cedar and redwood siding both carry natural oils that can slow filler adhesion and cause uneven stain absorption around a repaired hole. Treated lumber presents a different issue: filler applied directly over the chemical treatment sometimes fails to bond properly, so a primer coat formulated for treated wood helps close that gap. In high-humidity climates, extend cure times beyond the product label's minimum, and in regions with hard freeze-thaw cycles, favor epoxy over filler since filler is more prone to cracking as the wood expands and contracts.
Vintage siding original to a home presents its own challenge, since matching stain color or board profile on discontinued siding styles is often impossible with off-the-shelf materials. When the siding itself is irreplaceable or the finish match matters more than a quick fix, a exterior home repair team can source compatible materials and blend the repair in a way that holds up to close inspection.
Preventing Re-Damage After Repair
A properly finished and hardened repair rarely attracts renewed pecking at that exact spot, since the material no longer feels or sounds like wood to the bird. However, if feeding holes indicated carpenter bees or other insects, repairing the hole without addressing the pest problem underneath means the woodpecker (or a new one) will likely return to the same general area once insects reappear.
Maintenance and Long-Term Care
Expect exterior wood filler repairs to hold for two to five years before needing a touch-up, depending on climate exposure and wood movement. Spray foam and putty combinations typically last five to ten years if the initial application was done correctly. Epoxy repairs, given proper cure and application, commonly hold ten years or more, even through freeze-thaw cycling.
- Inspect repaired areas annually, ideally in spring before nesting season begins
- Watch for paint peeling or caulk separation at the repair edges, which signals the patch is starting to fail
- Reapply stain or paint touch-ups as the surrounding siding weathers, since color mismatch becomes more visible over time
- Address any new pecking activity quickly before it reopens or expands an existing repair
Things to Consider Before You Start
- Is the damage purely cosmetic, or does it point to a bigger problem? Soft wood, sawdust trails, or holes near window and door frames deserve a closer look before you fill anything.
- Do you have the right ladder setup for the repair height? Second-story siding repairs carry real fall risk that a single-story project does not.
- Are you prepared to match an older stain or paint color? A perfect material application still looks unfinished if the color match is off.
- Is this one hole or a recurring pattern? Repeated woodpecker activity across seasons may point to an underlying insect or moisture issue worth investigating before another repair cycle.
If your honest answers point toward ladder risk, uncertain wood condition, or a finish match you are not confident tackling, that is the side of the line where bringing in help makes more sense than pushing through alone.
Why Homeowners Bring in Ace Handyman Services
- Peace of mind on siding that cannot easily be replaced or matched once damaged further
- A one-year labor warranty backing the repair work performed
- No need to source, learn, or return specialty tools like epoxy applicators or foam guns
- Background-checked, multi-skilled W-2 craftsmen, not gig-platform contractors
- A predictable weekday scheduling window instead of losing a weekend to ladder work
- Honest scoping that recommends spot repair when that is genuinely sufficient, rather than upselling a full replacement
- Cleanup included, so sawdust, old filler packaging, and debris do not become a follow-up chore
If the holes keep multiplying, the ladder work feels riskier than the repair itself, or you would simply rather have someone else handle the diagnosis and the fix, reach out to your local Ace Handyman Services office to get the project scoped and scheduled.
Frequently Asked Questions
Will homeowners insurance pay for woodpecker damage?
Coverage varies significantly by policy and insurer. Many standard homeowners policies exclude bird damage as a "pest" exclusion, similar to insect or rodent damage, though some policies cover it if it results in sudden structural harm. Check your specific policy language, and plan on DIY or professional repair costs either way since coverage is not guaranteed.
How do I know if a woodpecker hole is from nesting, feeding, or drumming?
Size and pattern tell the story. Tiny clustered holes indicate drumming, a single round one-to-two-inch hole indicates nesting, and irregular scattered holes with visible sawdust nearby indicate feeding on insects living in the wood.
Should I fill woodpecker holes immediately or wait for the bird to finish?
If a nest is actively in use, wait until the nesting season ends before repairing, since disturbing an active nest can be both counterproductive and, depending on species, legally protected. Drumming and feeding holes with no active nest can be repaired as soon as you are ready.
Can I use the same repair method for all woodpecker hole types?
No. Drumming holes are cosmetic and need only filler. Nesting holes may indicate deeper structural softening worth investigating before filling. Feeding holes often require pest treatment for the underlying insects before the repair will actually hold.
What's the difference between wood filler, wood putty, and epoxy for siding repairs?
Wood filler is lightweight, shrinks slightly, and suits small cosmetic holes. Wood putty is denser and often used as a topcoat over foam-filled cavities. Epoxy does not shrink, cures harder, and holds up longest, making it the choice for holes where durability matters more than speed or cost.
How much does it cost to repair woodpecker holes in wood siding?
Materials for a handful of small holes typically run under fifty dollars in filler and sandpaper. Larger clusters requiring foam, putty, and matched paint or stain can run into a few hundred dollars in materials alone, and that does not include ladder rental or specialty tools if you do not already own them.