


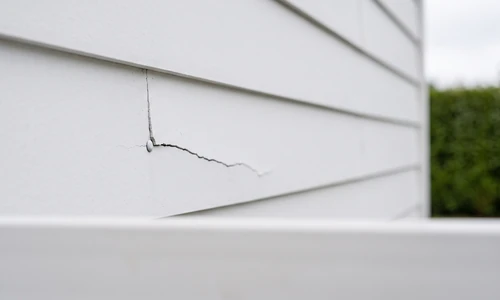
A crack in Hardie board siding rarely means the whole run needs to come down. Fiber cement is a tough, cement-based material designed to resist rot, fire, and pests, but it is not immune to impact damage, hairline surface cracking, or the occasional gap that opens up at a joint. Knowing how to repair Hardie board siding starts with an honest look at what kind of damage you are dealing with, because the right fix depends entirely on crack width, depth, and location.
Can Hardie board siding be repaired? Yes, in most cases. Hairline surface cracks, small gaps at joints, and isolated impact damage typically respond well to flexible caulk or fiber-reinforced patching compound. Wider cracks that run through the full thickness of the board, show active movement, or spread across multiple panels usually point toward replacement instead of repair.
Some homeowners handle Hardie board repair themselves with a caulk gun and a Saturday afternoon. Others get partway into a patch, realize the color match is off or the crack keeps reopening, and decide to bring in help. Ace Handyman Services works with fiber cement siding at every stage of that spectrum, whether you need a second opinion on a crack or want the whole repair handled start to finish.
Quick Overview: What Hardie Board Repair Actually Involves
Most Hardie board repairs follow the same basic arc, whether you are dealing with a single hairline crack or several impact marks along a wall. Here is what the process looks like stage by stage:
- Assessment: Measure crack width and depth, check for movement, and decide if the damage is cosmetic or structural.
- Material selection: Choose between flexible caulk, fiber-reinforced patching compound, or a bridging technique with fiberglass mesh based on crack severity.
- Surface prep: Clean the area, remove old caulk or loose material, and confirm the substrate is dry.
- Repair application: Apply the chosen material, working it into the crack and feathering the edges.
- Curing: Allow the manufacturer-recommended cure time before sanding or painting.
- Finishing: Sand, prime, and paint to blend the repair with surrounding siding.
- Follow-up: Inspect the repair after the first season to confirm it held through temperature swings and moisture exposure.
Assessing Hardie Board Damage: Can Your Crack Be Repaired?
Fiber cement cracks in a limited number of ways, and most of them are diagnosable without special tools. Before you buy anything, walk the affected area and answer three questions: how wide is the crack, how deep does it go, and is anything moving when you press gently on either side of the damage.
Hairline Surface Cracks
A hairline crack, generally under 1/16 inch wide, is the most common damage type and the most DIY-friendly. These usually form from minor impact, expansion and contraction cycles, or a manufacturing stress point. They sit at or near the surface rather than running through the full board thickness. Repair success rates on hairline cracks are high when the surface is properly prepped and the right flexible material is used.
Wider Cracks and Structural Concerns
Cracks wider than 1/8 inch, cracks that run the full depth of the board, or damage accompanied by visible movement when you flex the panel are a different category. If a crack has grown over a few weeks, if you can see daylight or the wall sheathing behind it, or if multiple boards near each other show the same pattern, that points to a structural issue rather than a cosmetic one. In these cases, patching may mask the problem temporarily but will not resolve whatever is causing the movement.
Repair Materials and Methods: Comparing Approaches
Three main approaches cover most Hardie board repairs: flexible caulk-based sealants for hairline damage, fiber-reinforced patching compounds for moderate cracks, and a bridging technique using fiberglass mesh for wider or structural repairs. Each trades off differently on visibility, durability, and skill required, and none of them is universally correct for every crack.
Flexible Caulking and Sealant Approach
For hairline cracks and small gaps at joints, an elastomeric, paintable caulk rated for exterior fiber cement is the simplest entry point. It stays flexible through seasonal expansion, applies with a standard caulk gun, and typically skins over within an hour and cures fully within 24 to 48 hours before painting. Its limitation is coverage: caulk is not designed to bridge cracks wider than about 1/8 inch, and stretching it across a larger gap invites early failure.
Patching Compound and Reinforcement Method
For cracks in the 1/8 to 1/4 inch range, a flexible fiber-reinforced patching compound designed for cement board offers more body than caulk and can be feathered out over a wider area. This is the "bridging technique" often mentioned in DIY forums: a strip of fiberglass mesh is embedded into the compound over the crack, then a second thin coat is troweled over the mesh and feathered into the surrounding surface.
Other Materials You Will Need
- Exterior-grade elastomeric caulk rated for fiber cement
- Fiber-reinforced patching compound (cement board specific)
- Fiberglass mesh tape for bridging wider cracks
- Putty knife or flexible trowel
- 120 to 150 grit sandpaper
- Exterior primer and paint matched to existing siding color
- Mild detergent and a stiff brush for cleaning
- Painter's tape for clean edges
If sourcing the right compound, matching your existing paint color, and getting a clean feather edge sounds like more variables than you want to manage on a ladder, a siding repair professional can scope the materials and handle the application in one visit.
Step-by-Step Hardie Board Repair Process
Once you know which material fits your crack, the process itself follows a consistent sequence: prep, apply, finish.
Step 1: Preparing the Repair Area
Clean before you touch a caulk gun. Wash the damaged area with mild detergent and a stiff brush to remove dirt, mildew, and chalking paint residue, then let it dry fully, ideally 24 hours in dry weather. Remove any failing old caulk with a utility knife rather than layering new material over it. Check behind the crack for signs of moisture intrusion or damaged paper backing; if the substrate underneath feels soft or shows water staining, that area needs more than a surface patch.
Step 2: Applying Repair Material
Match the technique to the material. For caulk repairs, load the crack with a steady bead, then tool it smooth with a wet finger or caulk tool within the working time listed on the tube. For patching compound with fiberglass mesh, apply a thin base layer, press the mesh into it while wet, then apply a second thin coat over the mesh once the base has set enough to hold its shape, feathering the edges out several inches beyond the crack itself.
Step 3: Feathering and Finishing
Finishing determines whether the repair disappears or stands out. Once the compound has reached its recommended set time, lightly sand the patch with 120 to 150 grit paper to smooth the transition into the surrounding siding texture. Avoid sanding through to bare fiber cement; you are blending the patch surface, not removing it. This feathering step is the phase most DIY repairs skip, and it is the difference between a patch that reads as a repair and one that does not.
Choosing and Applying Finish Coats
Priming, Painting, and Cure Time
Let the repair cure fully before priming, which typically means 24 to 72 hours depending on humidity, temperature, and the product's data sheet. Apply an exterior primer formulated for fiber cement or masonry, then topcoat with paint matched as closely as possible to the existing siding. Painting over an undercured patch is one of the most common causes of early repair failure, since trapped moisture beneath the paint film leads to blistering or cracking that mimics the original damage.
Spot Repair vs. Full Panel Replacement
Not every crack requires pulling and replacing an entire course of siding, but some do. The decision comes down to how much of the board is compromised and whether the surrounding area shows the same failure pattern.
- Spot repair makes sense when: the crack is isolated, under 1/4 inch wide, shows no active movement, and the surrounding boards are sound.
- Spot repair makes sense when: the damage is purely cosmetic, such as a scuff or shallow surface crack from an impact.
- Full replacement makes sense when: multiple boards near each other show cracking, suggesting a systemic issue like improper fastening or expansion clearance.
- Full replacement makes sense when: you see evidence of moisture intrusion behind the board, warping, or soft spots in the substrate.
When to Replace Instead of Repair
Replacement is the better call when multiple large cracks suggest a systemic installation issue, when you see active structural movement, when water damage has compromised the substrate behind the siding, or when the aesthetic mismatch of a patch is unacceptable to you. None of these situations mean repair failed you; they mean the damage exceeded what a patch is designed to handle.
Special Considerations for Challenging Repairs
Corner boards and joints crack differently than flat panel faces because they take on more direct impact and see more movement from building settling. A crack right at a joint often needs both a flexible sealant and a check of the joint's original caulking, since a failed joint seal can be the actual source of water intrusion that caused the crack.
If you are working on siding installed more than 15 years ago, color matching gets harder since fiber cement paint fades unevenly over time. In these cases, a full course replacement sometimes produces a better visual outcome than a patch, even when the crack itself would technically be repairable. A exterior home repair specialist can advise on whether a patch or a board swap will look more consistent with your specific siding's age and finish.
Maintenance and Long-Term Care
How long does a Hardie board repair last? Caulk-based repairs typically hold for 5 to 7 years before needing attention, while fiber-reinforced compound patches with proper prep and finishing can last 7 to 10 years or more. Lifespan depends heavily on prep quality, material choice, and ongoing exposure to sun and moisture.
- Inspect caulked joints and patched areas annually, ideally each spring after winter freeze-thaw cycles.
- Repaint on the same cycle as the rest of your siding to keep patched areas from weathering at a different rate.
- Watch for new hairline cracks forming near old repairs, which can indicate an unresolved movement issue.
- Keep gutters and downspouts clear so runoff does not concentrate moisture against repaired sections.
Common Repair Mistakes to Avoid
- Skipping surface prep and applying material over dirt, chalking paint, or old failed caulk.
- Using a rigid, non-flexible sealant in a joint or crack that experiences seasonal movement.
- Applying compound over a substrate that has not fully dried after cleaning or rain.
- Mismatching repair materials, such as using interior spackle instead of an exterior fiber cement compound.
- Rushing the feathering step, leaving a visible ridge or lip where the patch meets original siding.
- Painting before the compound has reached full cure, trapping moisture under the topcoat.
Things to Consider Before You Start
- Can you reach the damage safely? Second-story cracks require stable ladder work and comfort at height, not just repair skill.
- Do you have a color match plan? A structurally sound patch that stands out visually may bother you more than the original crack.
- Is this an isolated crack or a pattern? If you find more than one or two cracks nearby, the underlying cause needs attention before any patch will hold.
- How much time can you give the cure schedule? Rushing paint onto an undercured patch undoes the whole repair.
If the honest answers point toward a straightforward, isolated hairline crack, this is a reasonable weekend project. If you are looking at multiple cracks, hard-to-reach areas, or uncertainty about what is causing the damage, that is the point where bringing in a professional makes more sense than working through trial and error on an exterior wall.
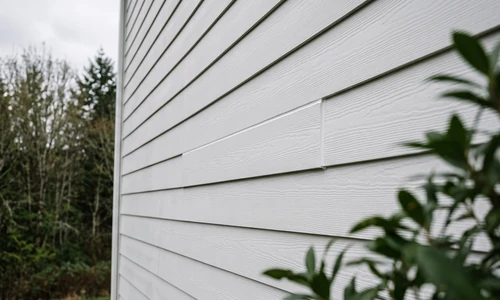
Why Homeowners Bring in Ace Handyman Services
- Peace of mind on an exterior surface where a botched patch is visible from the street and hard to undo cheaply.
- A one-year labor warranty backs the repair work, not just the materials.
- No need to source, test, and store specialty fiber cement compounds you will use once.
- Background-checked, multi-skilled W-2 craftsmen handle the repair, not a rotating cast of subcontractors.
- Weekday scheduling means you are not spending your weekend on a ladder second-guessing a crack.
- Honest scoping: if a simple caulk repair is genuinely all your siding needs, that is what gets recommended.
- Cleanup is included, so you are not left with sanding dust and empty compound tubs after the work is done.
If you have assessed the damage and are not confident in the repair path, or you would simply rather hand off the ladder work, reach out to your local Ace Handyman Services office to talk through your siding.
Frequently Asked Questions
Can you replace one piece of Hardie board?
Yes. Individual boards can be removed and replaced without disturbing the rest of the wall, as long as the fastening pattern and overlap are matched to the surrounding siding. This is common when a single panel has structural damage while neighboring boards remain sound.
What can I use to patch Hardie board siding?
For hairline cracks, an exterior elastomeric caulk rated for fiber cement works well. For wider cracks, a fiber-reinforced patching compound combined with fiberglass mesh tape provides more durable coverage. Match the product to the crack size rather than defaulting to whichever material you have on hand.
Can you repair fiber cement siding, or does it always need replacing?
Fiber cement siding can be repaired in most cases involving hairline cracks, small impact damage, or joint separation. Replacement becomes necessary when damage is widespread, structural, or accompanied by moisture intrusion behind the board.
How much does it cost to repair Hardie board siding?
Material costs for a small DIY repair typically run under fifty dollars for caulk, patching compound, and finishing supplies. Larger repairs involving board replacement or professional labor vary based on the scope and number of boards affected.
Will a Hardie board patch be visible after painting?
A well-feathered patch with matched paint should be difficult to spot from normal viewing distance. Visibility usually comes down to how well the edges were feathered and how closely the paint color and sheen match the existing siding.
How do I stop Hardie board cracks from coming back?
Use a flexible, paintable material rather than a rigid filler, since fiber cement expands and contracts with temperature. Also confirm the original cause, such as a fastening issue or moisture source, has been addressed rather than just patching the visible symptom.