


A stuck door knob turns a five-minute swap into an hour of frustration fast. Whether you are replacing worn-out hardware, upgrading to a new finish, or troubleshooting a knob that will not turn, knowing how to take off a door knob correctly saves your door finish, your knuckles, and your patience.
How do you take off a door knob without visible screws? Most interior knobs without visible screws use a spring-loaded release mechanism hidden in a small hole or slot along the knob shaft or collar. Insert a flathead screwdriver or similarly narrow tool into that opening, apply steady inward pressure while pulling the knob outward, and the knob separates from the spindle.
Removing a door knob yourself is a reasonable weekend task for most passage and privacy hardware. If you run into corroded screws, a keyed knob that will not release, or you are working on a historic door where a slip could cause real damage, Ace Handyman Services can step in at any point, from removal through full door installation and repair.
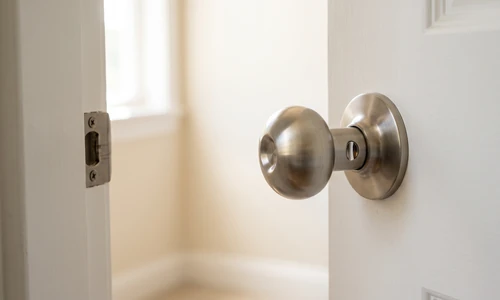
Quick Overview: What Removing a Door Knob Actually Involves
Door knob removal is a short, low-mess project when you know which mechanism you are dealing with. Here is the general sequence:
- Identify your knob type: passage, privacy, or keyed entry.
- Locate the release point: a hidden pin hole, visible set screws, or a rose ring that unscrews.
- Gather a flathead screwdriver, a narrow tool like an ice pick or paper clip, and possibly a Phillips or Allen driver.
- Apply steady pressure or unscrew fasteners while pulling the knob assembly free.
- Remove the rose ring and latch plate if you are replacing the full unit.
- Troubleshoot any stuck pins, painted-over holes, or stripped screws before forcing anything.
- Protect the door surface throughout with tape or a cloth barrier.
Most single-door removals take 10 to 20 minutes once you know where to look. Stuck or corroded hardware can add another 15 to 30 minutes for troubleshooting.
Identify Your Door Knob Type Before You Begin
Removal strategy depends entirely on which knob you have. Take 60 seconds to look at your hardware before reaching for a tool.
Passage Knobs (Push-to-Release Type)
Passage knobs have no lock and no key. They are common on closets, hallways, and interior doors that do not need privacy. These knobs almost always use a spring-loaded release mechanism accessed through a small hole or slot on the shaft, collar, or rose ring. This is the simplest type to remove.
Privacy Knobs (Interior Button Lock Type)
Privacy knobs have a small button or turn-lock on the interior side, common on bedrooms and bathrooms. The lock mechanism only engages the latch from inside; it does not block mechanical removal from either side of the door. The release pin or set screws function the same way as on a passage knob.
Keyed Entry Knobs (Exterior Locking Type)
Keyed entry knobs have a key cylinder on the exterior face, typically used on front and back exterior doors. The key operates the lock, not the physical attachment of the knob to the door. You can still remove a keyed knob mechanically from either side using the release pin or set screws, though the interior assembly may include an extra mounting plate.
Essential Equipment and Materials for Door Knob Removal
Primary Tool Decision
A flathead screwdriver handles the vast majority of removals. Its flat edge fits into release holes and slots, and its handle gives you enough leverage to depress a stiff spring pin. Keep a small and a medium flathead on hand since hole sizes vary by manufacturer.
Consumables and Tool Progression
If the flathead does not fit a narrow hole, step down to an ice pick or a straightened paper clip. These work well on tight-tolerance modern hardware but generate less leverage, so they are a backup rather than a first choice. For knobs with visible fasteners, match the screwdriver head (Phillips or Allen) to the screw type exactly; a mismatched driver strips the head fast.
Other Materials You Will Need
- Painter's tape to protect the door finish around the knob
- A soft cloth or towel to lay hardware on and catch small screws
- Penetrating oil for stuck or corroded mechanisms
- A small magnetic tray or bowl for screws and pins
- A rubber band, for extra grip on stripped screw heads
If gathering the right tool sizes for an older or unfamiliar knob feels like guesswork, a technician from Ace Handyman Services who works in door installation and repair arrives with the full range of drivers and specialty bits already on hand.
What Tools You Need (And Why Size Matters)
What tool do you need to take off a door knob? A flathead screwdriver is the primary tool for most removals, used to depress the release pin found in a small hole on the knob shaft or collar. Backup options include an ice pick or straightened paper clip for tight holes, and a Phillips or Allen driver for knobs with visible set screws.
Tool size matters more than most people expect. A screwdriver tip that is too wide will not fit into the release hole at all, while one that is too narrow slips off the pin without generating enough pressure to trigger the release. Test the fit before committing to a full push, and step down to a thinner tool if the first one will not seat properly.
Step-by-Step Door Knob Removal Process
Step 1: Locate the Release Point
Every removal starts with finding the mechanism, not the tool. Check three common locations: a small hole underneath the knob shaft, a slot along the edge near the collar, or a seam where the rose ring meets the door. On knobs with visible screws, look for small Allen or Phillips heads on the collar or rose plate instead.
Step 2: Apply Steady Pressure and Pull
Consistent pressure beats force every time. Insert your flathead screwdriver into the release hole and push in with steady, even pressure rather than jabbing or wiggling. While maintaining that pressure, pull the knob straight outward with your other hand. You should feel a slight give as the internal pin releases the knob from the spindle.
Step 3: Remove Visible Set Screws (If Present)
Screw-mount knobs skip the guesswork entirely. If your knob uses visible screws instead of a hidden pin, loosen them evenly, alternating sides so the collar does not bind or shift out of alignment. Once both screws are out, the knob halves separate cleanly from the spindle without any pulling force needed.
Step 4: Separate the Rose Ring and Latch Assembly
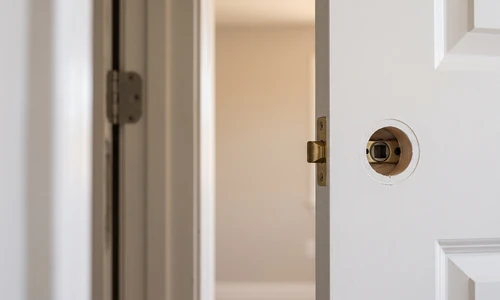
The rose ring usually twists free once the knob is gone. With the knob removed, the decorative rose ring typically slides or twists off the spindle sleeve. Behind it, you will find the latch assembly still mounted in the edge of the door, held by two screws in the door edge plate. Leave the latch in place unless you are replacing the entire lockset.
Step 5: Handle Lever-Style Handles the Same Way
Lever handles use identical internal mechanics. A lever functions the same as a round knob mechanically, just with a different exterior shape. Locate the release button, typically on the underside of the lever near the base, and apply the same push-and-pull technique. The pivot point sits closer to the door face, so support the lever gently as it releases to avoid it dropping.
Removing a Door Knob from the Outside vs. Inside
Can you take a door knob off from the outside? Yes. Removal is mechanically identical from either side for passage and privacy knobs, since the release pin or set screws sit on the assembly itself, not tied to interior or exterior positioning. For keyed entry knobs, the key cylinder sits on the exterior, but it does not block mechanical removal from the interior side.
The one difference you may notice is fastening style: exterior-facing rose rings on entry doors sometimes use a slightly heavier decorative plate. That plate still comes off with the same push-release or screw method as any interior hardware.
Protecting Your Door During Removal
Damage prevention deserves as much attention as the mechanics themselves, especially on finished or painted doors.
- Place painter's tape around the knob area before you start, shielding the finish from an errant screwdriver slip.
- Lay a cloth or towel under your workspace to catch small screws so they do not disappear into carpet or under a rug.
- Support the rose ring with your palm as it comes free rather than letting it drop or knock against the door edge.
- Wipe down old hardware immediately if it shows moisture or corrosion, preventing that residue from transferring to the door surface during the process.
Troubleshooting: When Removal Doesn't Go Smoothly
Most knobs release on the first or second attempt, but a few common problems can stall the process.
- The release hole is painted shut or too tight. Apply a small amount of penetrating oil around the opening and let it sit for a few minutes, then gently scrape away paint buildup with a pick before trying again.
- The pin won't activate despite steady pressure. You may be pressing the wrong spot. Check for a second hole location along the collar edge rather than only the shaft.
- Screw heads are stripped or stuck. Place a rubber band between the screwdriver tip and the screw head for extra grip, or use needle-nose pliers if the head has enough material exposed.
- The knob is old or corroded. Soak the joint area with penetrating oil and use gentle rotational tapping with a rubber mallet handle to loosen internal rust before pulling.
If a mechanism still will not respond after several attempts, stop before you force it and risk cracking the knob or the door face. That is a reasonable point to bring in a professional rather than continue applying pressure on hardware that is not moving.
Standard Removal vs. Full Lockset Replacement
Sometimes removing the knob is the entire job. Other times it is the first step toward installing a new lockset. Knowing which one you are doing changes what you touch next.
- Choose simple knob removal when you are only swapping the knob and the existing latch and strike plate are in good condition.
- Choose full lockset replacement when the latch is worn, the door has been re-keyed multiple times, or you are upgrading to a smart lock that needs a different bore configuration.
Special Considerations for Older or Antique Doors
Vintage hardware often uses mortise locksets rather than the modern bore-and-latch style, meaning the entire mechanism sits inside a rectangular pocket cut into the door edge rather than a simple round hole.
If you are working on a door with historic or irreplaceable hardware, moving slowly matters more than moving quickly. A misjudged pull on a century-old mortise knob can crack ceramic or brass that cannot be sourced again. This is a scenario where a technician experienced in doors and windows service can assess the mechanism before anything gets forced.
Next Steps After Removal: Installing a Replacement Knob
Once the old knob is off, you are left with the spindle, the latch assembly, and the mounting screws in the door edge. Measure the door thickness, the backset (distance from the door edge to the center of the bore hole), and the spindle style before purchasing a replacement. Most modern knobs use a universal spindle, but older doors sometimes require an adapter kit.
Maintenance and Long-Term Care
Keeping hardware easy to remove later starts with basic upkeep now. Wipe knobs periodically to prevent dust and grime from building up around the release mechanism, and apply a drop of light lubricant to the latch bolt once or twice a year to keep it moving smoothly.
- Check screws periodically and snug any that have loosened from regular door use.
- Keep exterior knobs free of corrosion with an occasional wipe-down, especially in humid climates.
- Avoid excessive force when turning stiff knobs, which can bend internal components over time.
Things to Consider Before You Start
- Do you know your knob type? Passage, privacy, and keyed entry knobs all use slightly different release points, so confirm which one you have before you start pulling.
- Is the hardware original or antique? Irreplaceable knobs deserve extra caution and possibly a professional assessment first.
- Do you have the right tool sizes on hand? A screwdriver that does not fit the release hole will cost you more time than gathering the correct sizes upfront.
- Is the knob stuck due to corrosion or paint? Plan for a troubleshooting step rather than assuming a clean pull on the first try.
If your answers point to straightforward hardware and a few basic tools, this is a solid DIY afternoon. If you are dealing with antique fixtures, a jammed mechanism, or a door you cannot risk damaging, that is the line where bringing in a professional makes more sense.
Why Homeowners Bring in Ace Handyman Services
Not every knob removal goes according to plan, and not every door is one you want to risk experimenting on.
- Peace of mind on irreplaceable or antique hardware that cannot be sourced again if damaged.
- A one-year labor warranty backs the work, so a mechanical issue after service is handled without extra cost.
- No need to source, learn, or return specialty tools for a single stuck mechanism.
- Background-checked, multi-skilled W-2 craftsmen handle the job, not a rotating gig contractor.
- Scheduling fits a predictable weekday timeline instead of eating into a weekend.
- Right-sized scope: a technician tells you honestly when a simple removal is all you need versus a full lockset upgrade.
- Cleanup is included, so you are not left sorting screws out of carpet fibers.
Whether you are stuck on a single jammed knob or planning a full round of hardware replacement throughout the house, you can reach out to your local Ace Handyman Services office to get the project handled from removal through installation.
Frequently Asked Questions
How do you remove a door knob with no visible screws or slot?
Check the shaft, the collar edge, and the seam where the rose ring meets the door for a small hidden hole. If none is visible, the knob likely uses a hidden set screw underneath the rose ring itself, which needs a small hex key to loosen before the knob will slide off.
Do you need any special tools to remove a door knob?
No specialty tools are required for most residential knobs. A flathead screwdriver handles the majority of removals, with a Phillips or Allen driver needed only if your knob uses visible set screws instead of a spring-release pin.
Why won't my door knob come off even after I press the release hole?
You may be pressing the wrong location, since some knobs have a second release point along the collar rather than the shaft. Paint buildup, corrosion, or a bent internal pin can also block the mechanism, in which case penetrating oil and gentle scraping usually resolve it.
Can you remove a locked privacy door knob without a key?
Yes. The interior lock button only engages the latch bolt; it does not affect the mechanical connection between the knob and the spindle. The same release pin or set screw method used on passage knobs works on locked privacy knobs.
How long does it take to remove a door knob?
A standard passage or privacy knob typically takes 10 to 15 minutes to remove. Add extra time for knobs with stripped screws, corrosion, or paint buildup around the release mechanism, which can extend the process by 15 to 30 minutes.
What should you do if you strip the screws on a door knob?
Try a rubber band between the screwdriver tip and the screw head for added grip, or switch to needle-nose pliers if enough of the screw head is exposed. If the screw still will not budge, a professional can extract it without damaging the surrounding hardware or door surface.