


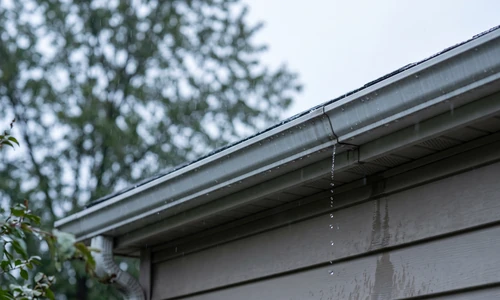
Water dripping from a gutter seam or pooling along the fascia after every storm is not just an inconvenience. Left alone, a leaking gutter routes water straight into siding, soffits, and foundation soil, and that kind of moisture exposure adds up fast. This guide walks through why gutters leak, how to pinpoint the exact failure point, and what it takes to fix the problem for good.
Why is my gutter leaking? Most gutter leaks trace back to one of five causes: clogged debris forcing water over the edge, failed seams and joints, improper slope that stops water from draining, holes from rust or impact damage, and sealant that has degraded from sun and temperature swings. Identifying which one applies to your gutter determines whether the fix is a five-minute patch or a section replacement.
Some of these fixes are straightforward weekend jobs. Others involve ladder work at height, slope corrections that need a level and some patience, or full section replacement that goes faster with a second set of hands. Ace Handyman Services is worth considering at any point in this process, whether you want a second opinion on your diagnosis or you would rather hand off the ladder work entirely.
Quick Overview: What Happens When a Gutter Leaks
A gutter is a sealed channel system, and a leak means one of its seals or surfaces has broken down. Here is what the diagnosis-to-repair process typically looks like:
- Inspect the gutter from inside and outside, ideally during or right after rainfall, to find where water is actually escaping
- Match the leak location to one of the common failure types: clog, seam separation, slope error, hole, or sealant breakdown
- Clean out debris first, since a clog can mimic or worsen almost every other type of leak
- Gather the right sealant, patch material, or replacement section based on what you found
- Make the repair, working section by section rather than patching the whole run at once
- Test with a hose before calling the job done, since a dry-weather inspection can miss active leaks
- Set a maintenance schedule so the same failure point does not reopen next season
How to Identify Where Your Gutter Is Leaking
To find your gutter leak, inspect seams and joints for separation or cracked sealant, check interior gutter walls during or after rain for water trails, and examine downspout connections and end caps for gaps. Look for exterior rust spots or holes, and note any section where water pools instead of draining, since pooling points to a slope problem.
Interior Inspection
Climb to gutter height (safely, with a properly footed ladder) during a rain event or immediately after one. Water trails on the interior wall of the gutter, or a wet streak running down from a seam to the fascia below, tell you exactly where the failure sits. Dry seams during active rain rule out that section.
Exterior Inspection
From the ground or the ladder, look along the seam lines connecting gutter sections for visible separation, cracked caulk, or a chalky white residue where sealant has broken down. Check end caps for gaps at the corner seal, and look at downspout outlets for loose connections. Rust-colored streaks on the gutter face usually mark a pinhole from the inside out.
The 5 Most Common Causes of Gutter Leaks
Gutter leaks stem from five primary causes: clogged gutters and downspouts blocking water flow, failing seams and joints where sealant degrades, improper slope preventing water drainage, holes from rust or impact, and sealant failure from UV exposure and temperature cycling. Most leaks are preventable with regular cleaning and an annual inspection.
Clogged Gutters and Downspouts
Leaves, twigs, roofing grit, and the occasional bird nest accumulate over a season and block the channel. Once water cannot move toward the downspout, it backs up and finds the weakest point, usually a seam, and pushes through. Clog frequency depends on your tree cover and roof pitch; homes under heavy tree canopy may need cleaning three or four times a year instead of the standard twice.
Seam and Joint Failure
What causes gutter seams and joints to fail over time? Gutters are built in sections joined with sealant, either factory-applied silicone or field-applied caulk. UV exposure and repeated thermal expansion and contraction cause that sealant to crack and pull away from the metal over five to ten years, opening a gap at exactly the point where two sections meet.
Improper Gutter Slope
Gutters need roughly a quarter-inch of drop for every ten feet of run toward the downspout. When that slope is off, whether from a poor original install or fascia that has shifted with the house, water pools in the low spot instead of draining. Standing water stresses seams and eventually finds a way out.
Holes and Punctures
Pinhole leaks from rust are different from punctures caused by a falling branch or ladder impact, and the material matters. Aluminum resists rust but dents; steel gutters rust from the inside out; vinyl holds a patch poorly. Small holes under a quarter inch can usually be sealed; anything larger tends to need a section swap.
Sealant Failure
Even where the metal is sound, the sealant holding a joint or end cap together has a service life. Silicone caulk exposed to direct sun and freeze-thaw cycling becomes brittle and shrinks away from the surfaces it was bonding, opening a hairline gap that widens with every season.
Seasonal and Environmental Factors That Trigger Leaks
Gutter leaks often worsen in specific seasons. Freeze-thaw cycles in winter stress sealant and cause micro-fractures at joints. Heavy rain during wet seasons overwhelms gutters that already have marginal slope.
Is it normal for new gutters to leak? A small amount of weeping during the first winter, as sealant fully cures under real temperature swings, is not unusual. A leak that continues past the first season or shows up at multiple joints usually signals an installation problem and is worth having checked before it becomes a bigger repair.
Essential Equipment and Materials for Gutter Leak Repair
Ladder and Access Equipment
A properly rated extension ladder with stabilizers is non-negotiable for gutter work. Standoffs that hold the ladder away from the gutter face let you work on the seam without crushing it, and they reduce the temptation to overreach. If your roofline has multiple stories or steep pitches, this is often the first place DIY plans hit a wall.
Sealants and Patch Materials
Choose a sealant rated specifically for gutters, not general-purpose caulk. Polyurethane and butyl-rubber gutter sealants flex with temperature change and adhere well to aluminum, steel, and vinyl. For holes larger than a pinhole, a metal patch or gutter repair fabric embedded in sealant bridges the gap before a fresh sealant layer goes over the top.
Other Materials You Will Need
- Wire brush and rag for cleaning the repair surface
- Rubbing alcohol or gutter-safe degreaser
- Putty knife for sealant application
- Work gloves and safety glasses
- Garden hose for a post-repair leak test
- Replacement end caps or a short gutter section, if the damage warrants it
If assembling this list and figuring out which sealant matches your gutter material feels like the part where things could go sideways, a gutter repair visit takes that guesswork off your plate and gets the right materials on the ladder the first time.
Step-by-Step Gutter Leak Repair Process
Step 1: Clean the Full Run First
Clear debris before diagnosing anything else. Scoop out leaves and sediment along the entire gutter run, then flush with a hose from the far end toward the downspout. This step alone resolves a surprising share of reported leaks and makes every other symptom easier to see clearly.
Step 2: Dry the Repair Area and Prep the Surface
Sealant only bonds to a clean, dry surface. Wipe down the seam or hole with rubbing alcohol and a rag, then lightly scuff with a wire brush if there is rust or old caulk residue. Skipping this step is the most common reason DIY gutter patches fail within a season.
Step 3: Apply Sealant or Patch Material
Match the fix to the failure size. For a hairline seam crack, run a bead of gutter sealant along the full joint and smooth it with a putty knife so it fills the gap rather than sitting on top. For a hole over a quarter inch, embed a metal patch in a first sealant layer, let it tack, then cover with a second layer extending past the patch edges.
Step 4: Test with a Hose Before You Call It Done
Never trust a dry-weather repair without a wet test. Run water from the far end of the gutter and watch the repaired section closely. If the sealant holds under a steady flow, let it cure fully per the product label before exposing it to real rain.
Choosing and Applying Gutter Sealants and Patches
Application and Cure Window
Can I seal a gutter leak myself, and what products work best? Yes, for most seam cracks and small holes. Polyurethane or butyl-rubber gutter sealants applied to a clean, dry surface hold up well and typically last three to five years before needing reapplication. Most cure to a rain-ready state within 24 to 48 hours, though full cure can take up to a week depending on temperature and humidity, so avoid heavy rain exposure in that window when possible.
Sealing a Leak vs. Full Section Replacement
Not every gutter leak calls for tearing out a section. Sealing is the right call when the metal itself is sound and the failure is limited to a joint or a small hole. Full section replacement makes more sense when the damage is structural or widespread.
- Seal it when: the leak is a single hairline crack at a seam, a pinhole under a quarter inch, or a small gap at an end cap that is otherwise intact
- Seal it when: the gutter itself is under ten years old and shows no other signs of sagging or corrosion
- Replace the section when: you find multiple holes clustered in one area, visible rust-through, or a section that has separated from its hangers
- Replace the section when: the slope is off and correcting it means resetting hangers along a run, not just patching the low point
Special Considerations for Older or Damaged Gutter Systems
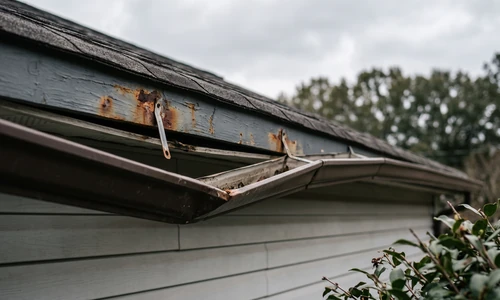
Gutters older than 15 to 20 years often develop leaks in more than one spot at once, which is a sign of general material fatigue rather than a single fixable failure. Steel gutters that have started rusting from the inside typically have thin spots you cannot see yet, and sealing one hole often just relocates the problem to the next weak point.
If your inspection turns up more than two or three separate leak points, or the gutter shows sagging away from the fascia, a broader assessment through gutter repair service makes more sense than chasing individual patches. It is worth pairing that inspection with a look at your soffit and fascia as well, since water that has been finding its way past the gutter for a while often does quiet damage to the wood behind it.
Maintenance and Long-Term Care
How do I stop my gutters from leaking? The most effective long-term fix is prevention: keep gutters clear of debris, inspect seams annually for cracked sealant, and confirm slope and hanger spacing are still correct. Catching a hairline crack before it widens is far easier than dealing with a fully separated seam later.
- Clean gutters twice a year at minimum, spring and fall, or quarterly if heavy tree cover drops debris year-round
- Inspect seams and end caps every spring for cracked or shrinking sealant before storm season ramps up
- Confirm downspouts discharge water at least several feet from the foundation to protect both gutters and the slab
- In cold climates, check attic insulation and ventilation to reduce ice dam risk, which stresses sealant hard every winter
- Keep a record of when sealant was last applied so you can proactively refresh it before it fails
Is it normal for gutters to drip in heavy rain? A small amount of overflow during an unusually heavy downpour can happen even on a well-functioning gutter system if rainfall exceeds its capacity. Consistent dripping during normal rain, though, points to a real problem such as a clog, slope issue, or seam failure that needs attention.
Things to Consider Before You Start
- Are you comfortable on a ladder at your roofline height? Gutter work often means multiple trips up and down, and second-story runs raise the stakes on every misstep.
- Do you know your gutter material? Aluminum, steel, and vinyl each respond differently to sealants and patches, and using the wrong product wastes time and money.
- Is this an isolated leak or a symptom of age? One clean seam crack is a good DIY candidate. Multiple leaks across an old system suggest a bigger job.
- Do you have someone to foot the ladder? Working alone at height adds risk that is easy to underestimate.
If your honest answers land on the side of caution, that is a fair reason to bring in help rather than push through it solo.
Why Homeowners Bring in Ace Handyman Services
A gutter leak that goes unaddressed does not stay small. Water finds the path of least resistance into fascia, siding, and eventually the foundation, and the cost of that slow damage outpaces the cost of a proper repair. Here is what homeowners get when they bring in professional help:
- Peace of mind knowing an irreplaceable piece of your home's water management system is diagnosed correctly the first time
- A one-year labor warranty backing the repair, not just the materials
- No need to source, learn to use, or return specialty ladder and sealant equipment
- Background-checked, multi-skilled W-2 craftsmen, not a rotating cast of subcontractors
- A predictable weekday appointment window instead of losing a weekend to ladder work
- Honest scoping that recommends sealing a small leak instead of upselling a full replacement when it is not warranted
- Cleanup included, so old sealant scraps and debris do not become your afterthought
If your gutter inspection turned up more than you bargained for, or you would simply rather not spend a Saturday on a ladder, reach out to your local Ace Handyman Services office to get it handled.
Frequently Asked Questions
Why is water dripping from the bottom of my gutter?
Water dripping from the bottom, rather than over the edge, usually means a hole or a separated seam directly above the drip point. Follow the drip up to the gutter and inspect that section for rust, a puncture, or cracked sealant at the nearest joint.
How much does it cost to fix a leaking gutter?
Sealing a small leak yourself typically costs under 30 dollars in sealant and patch materials. Professional repair for a single seam or hole generally runs modestly higher once labor and access equipment are factored in, while full section replacement costs more depending on gutter material and run length.
Can a leaking gutter cause foundation damage?
Yes, over time. Water that consistently escapes near the foundation rather than routing through the downspout can saturate soil next to the footing, which contributes to settling and cracking in slow-moving cases. Correcting a leak early avoids that risk entirely.
How long does gutter sealant last?
Quality polyurethane or butyl-rubber gutter sealant typically holds for three to five years before it needs reapplication, depending on sun exposure and climate. Sealant in shaded, mild climates often lasts longer than sealant on a south-facing run in a hot, dry region.
Should I repair or replace an old gutter system?
If the system is under 15 years old with an isolated leak, repair is usually the right call. Once you see multiple leak points, visible sagging, or rust-through in more than one section, replacement typically costs less over time than a cycle of repeated patches.
Can I fix a gutter leak in the rain?
No. Sealant needs a clean, dry surface to bond properly, and applying it to a wet or actively leaking section will fail quickly. Wait for a dry window, make the repair, and test with a hose once the sealant has had time to cure.